First-run setup
Gets a fresh installation ready to use: activate the license, confirm your organization’s details, and connect KPImailer to Qlik Sense and to an email server.
1. Activate your license and confirm your organization
Section titled “1. Activate your license and confirm your organization”Sign in with the administrator account you created during installation. Open Settings → Account & license to confirm the license is active and to check your organization’s contact details, which Relevance Management uses for licensing and support.
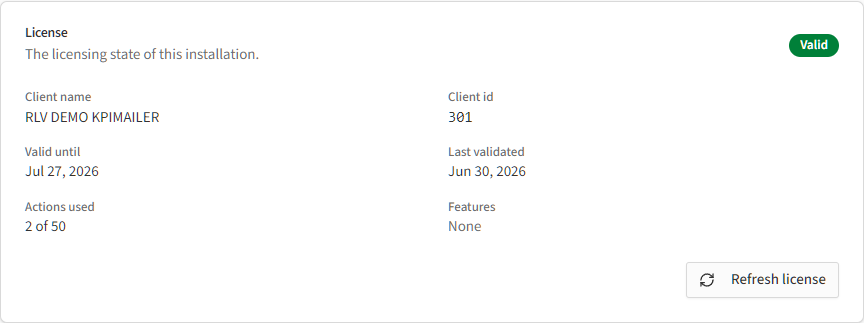
The Valid until date and Actions used counter tell you how the license is tracking. If the license has expired or you’ve changed contact details, use Refresh license to re-sync the status.
2. Connect Qlik Sense
Section titled “2. Connect Qlik Sense”Open Settings → Qlik servers. KPImailer connects to one on-premise Qlik Sense Enterprise server and one Qlik Cloud tenant - add either or both, depending on where your apps live.
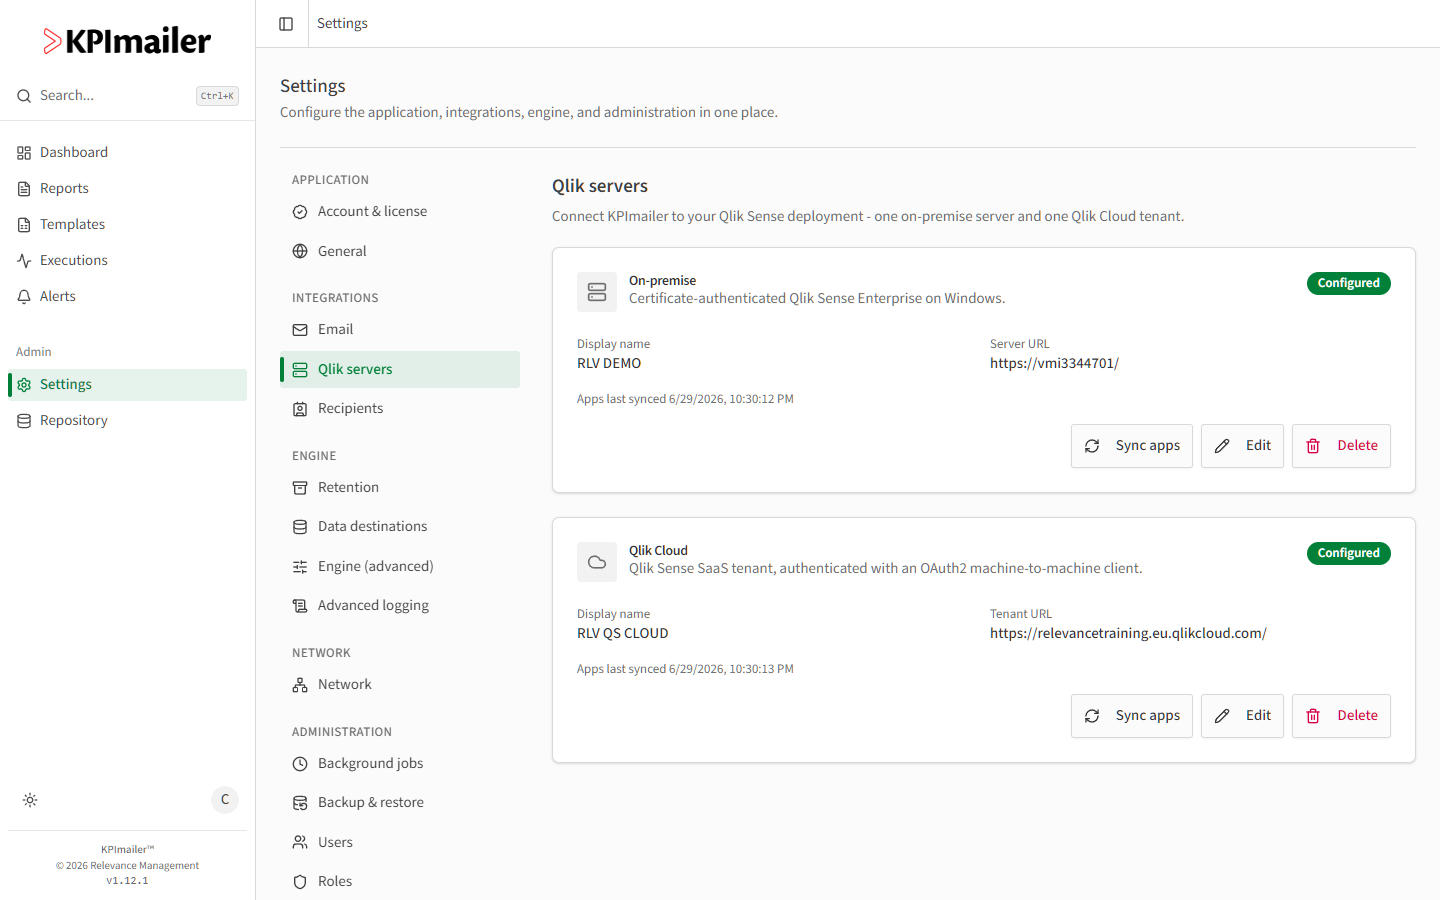
For each server you add, give it a display name, the server or tenant URL, and the credentials it asks for (certificate-based for on-premise, an OAuth2 client for Qlik Cloud). Once a server shows Configured, use Sync apps to pull in its published Qlik apps so they’re available when you create reports.
3. Configure email delivery
Section titled “3. Configure email delivery”Open Settings → Email. This is the SMTP profile KPImailer uses to send every report and alert, so it’s worth setting up before you build your first report.
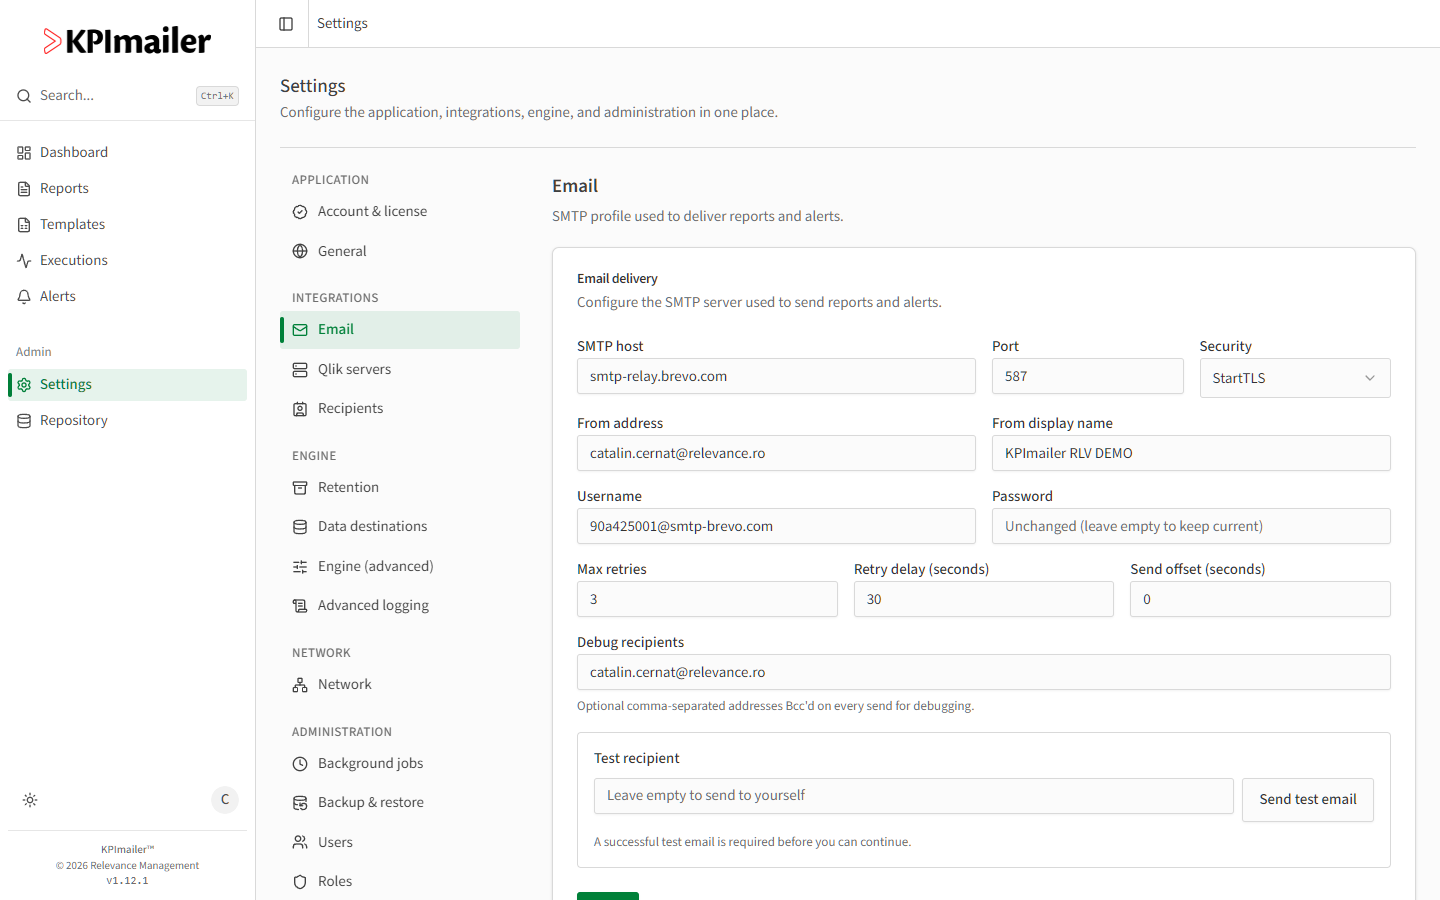
Fill in your SMTP host, port, and security mode, a from address and display name, and the credentials your mail provider requires. Use Send test email to confirm delivery works end to end before relying on it - a successful test is required before you can continue.
Worked example
Section titled “Worked example”A typical first run looks like this: confirm the license is Valid, add your on-premise Qlik Sense server and click Sync apps, then fill in the SMTP settings for your organization’s mail server and send a test email to yourself. Once that test arrives, you’re ready to sign in day to day and move on to creating your first report.